Equipment
* optional
Ingredients
Levain
- 100 g active sourdough starter, bubbly, passed float test
Main Dough
- 350 g water, lukewarm
- 450 g bread flour, unbleached
- 50 g whole wheat flour
- 10 g fine sea salt
Nutrition (per serving)
Method
In a large mixing bowl, thoroughly dissolve the active sourdough starter in the lukewarm water. Add the bread flour and whole wheat flour. Mix by hand until a shaggy, dry dough forms and no dry spots of flour remain. Cover and let rest for 45 minutes to autolyse.
Sprinkle the fine sea salt evenly over the dough. Moisten your hands slightly with water and pinch the salt into the dough, then stretch and fold it over itself for about 5 minutes until the salt is fully incorporated and the dough begins to feel cohesive.
Cover the bowl to begin the bulk fermentation. Over the next 2 hours, perform a set of stretch and folds every 30 minutes. Grab the underside of the dough, pull it up until you feel resistance, and fold it over the center. Rotate the bowl and repeat 4 times per set.
After completing the folds, allow the dough to rest undisturbed at room temperature for another 2 to 3 hours, or until it has increased in volume by about 50 percent, shows scattered air bubbles on the surface, and jiggles slightly when the bowl is shaken.
Turn the dough out onto a lightly floured surface. Gently shape it into a round boule by pulling the edges into the center, flipping it over, and dragging it gently across the un-floured portions of the counter to build tension on the surface.
Generously dust a banneton with rice flour or regular bread flour. Place the shaped dough into the basket seam-side up. Cover the basket tightly and place it in the refrigerator for a cold retard of 12 to 16 hours.
Place a Dutch oven with its lid inside the cold oven. Preheat the oven to 260°C/500°F for at least 45 minutes to ensure the cast iron is thoroughly saturated with heat.
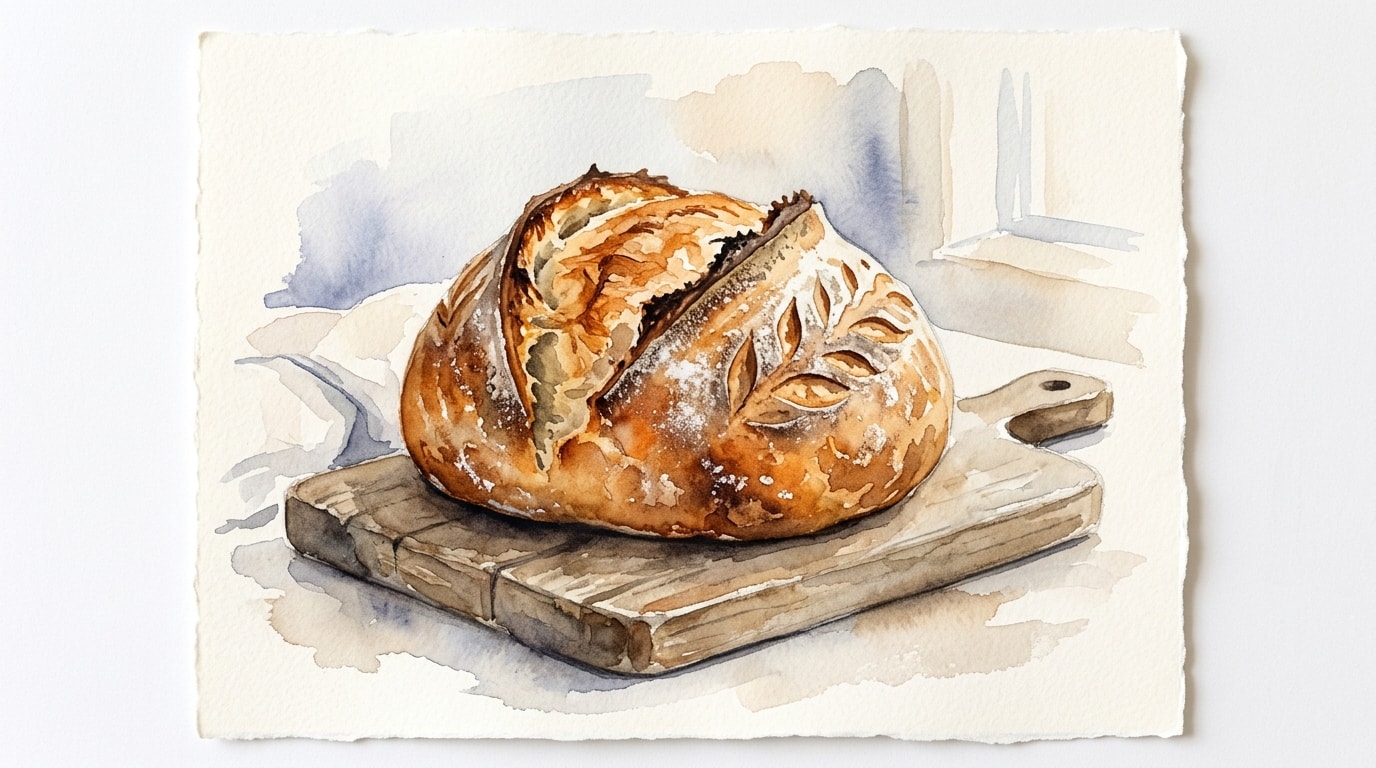
Turn the chilled dough out gently onto a large piece of parchment paper. Using a lame or sharp razor blade, make a swift, confident score across the top of the dough, about half an inch deep, holding the blade at a slight 45 degree angle.
Carefully transfer the dough and parchment paper into the hot Dutch oven. Cover immediately with the lid to trap the steam escaping from the dough, and bake at 230°C/450°F for 20 minutes.
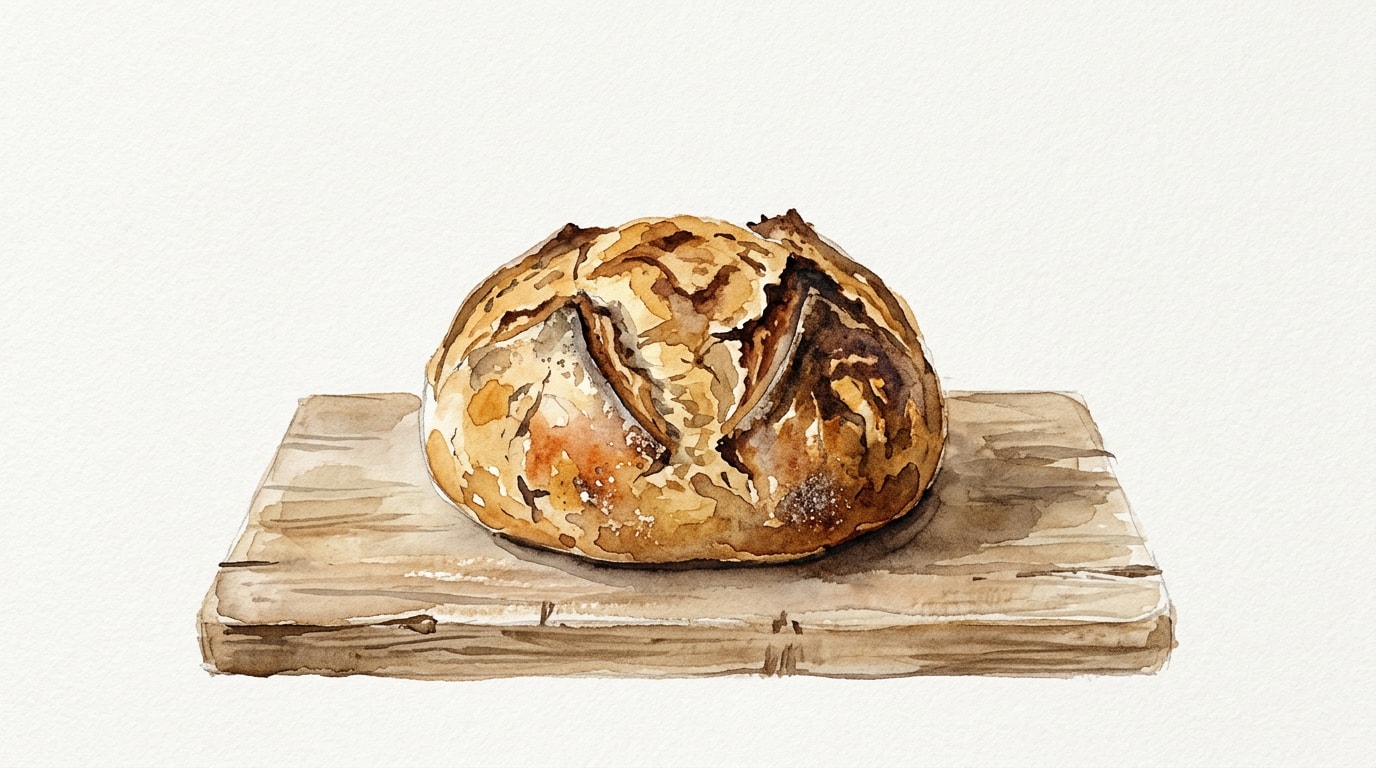
Carefully remove the lid from the Dutch oven. Continue to bake at 230°C/450°F for an additional 20 to 25 minutes, until the crust is a deep, dark mahogany brown and an instant read thermometer inserted into the center reads at least 96°C/205°F.
Use a spatula to lift the bread out of the Dutch oven and transfer it directly to a wire cooling rack. Allow the bread to cool completely for at least 2 hours before slicing. Slicing too early will result in a gummy crumb.
Chef's Notes
- Ambient temperature dictates everything in sourdough baking. If your kitchen is cooler than 21 degrees Celsius, expect bulk fermentation to take significantly longer than the times listed. Watch the dough, not the clock.
- The autolyse step fully hydrates the flour and passively develops gluten strands before the acidic starter and salt are introduced, ultimately reducing the amount of physical kneading required.
- Scoring the loaf at a 45 degree angle rather than straight down creates a small flap of dough that will peel back as the bread springs in the hot oven, creating the signature crusty ear.
- If your loaf consistently burns on the bottom while in the Dutch oven, place a heavy baking sheet on the rack directly below the Dutch oven to deflect intense direct heat from the bottom element.
Storage
Freezer: 3 months — Slice the loaf completely before freezing to easily retrieve individual portions.
Reheating: Refresh a whole or partial loaf in a 150°C/300°F oven for 10 minutes. Toast individual frozen slices directly from the freezer.