Equipment
* optional
Ingredients
Sushi Rice
- 200 g short-grain sushi rice, dry, uncooked
- 240 ml water
- 30 ml rice vinegar
- 15 g white sugar
- 5 g fine sea salt
Simmered Vegetables
- 15 g dried shiitake mushrooms, rehydrated in warm water, stems removed, sliced thinly
- 100 g carrots, peeled and julienned into long thin strips
- 100 ml dashi stock
- 15 ml soy sauce
- 10 g white sugar
- 10 ml mirin
Dashi-Maki Tamago
- 3 eggs
- 30 ml dashi stock
- 10 g white sugar
- 5 ml mirin
- 5 ml light soy sauce
- 10 ml vegetable oil, for greasing the pan
Assembly
- 2 nori sheets, whole sheets
Nutrition (per serving)
Method
Rinse the sushi rice thoroughly in cold water until the water runs clear. Combine the drained rice and water in a rice cooker or heavy-bottomed pot and cook until tender.
While the rice is cooking, prepare the sushi vinegar (sushi-zu) by combining the rice vinegar, sugar, and fine sea salt in a small bowl. Stir vigorously until the sugar and salt are completely dissolved.
Transfer the hot, freshly cooked rice to a large shallow bowl. Pour the prepared sushi vinegar evenly over the rice. Use a rice paddle or spatula to gently fold the liquid into the rice using a sharp, slicing motion to avoid crushing the grains.
Spread the seasoned rice out in an even layer in the shallow bowl. Fanning the rice while continuing to fold gently will give the grains a glossy finish. Allow the rice to cool to body temperature, approximately 37C/98F, before assembling.
In a small saucepan, combine the sliced rehydrated shiitake mushrooms, julienned carrots, 100ml dashi stock, soy sauce, sugar, and mirin. Bring to a boil, then reduce heat and simmer until the liquid is almost entirely absorbed and the vegetables are tender.
Crack the eggs into a bowl and gently whisk them together with 30ml dashi, sugar, mirin, and light soy sauce. Do not over-beat to avoid incorporating too much air. Note: If serving vulnerable populations, ensure eggs are pasteurized or cook to 74C/165F internal temperature.
Heat a lightly oiled tamagoyaki pan over medium heat. Pour in a thin layer of the egg mixture. Once the bottom sets but the top is still slightly soft, roll it up toward the top of the pan. Slide the rolled egg back to the bottom, oil the empty pan surface, and pour another thin layer, lifting the first roll slightly so the new egg flows underneath. Repeat until all mixture is used.
Remove the completed omelette from the pan and let it rest until cool enough to handle. Slice it lengthwise into long, thick strips about 1.5 centimeters wide.
Place the bamboo sushi mat flat on your work surface. Lay one sheet of nori on the mat with the shiny side facing down. Moisten your hands with a mixture of water and a splash of rice vinegar (tezu) to prevent sticking.
Take half of the seasoned sushi rice and spread it gently and evenly across the nori, leaving a clear 2-centimeter border at the top edge. Avoid pressing down heavily on the rice to maintain an airy texture.
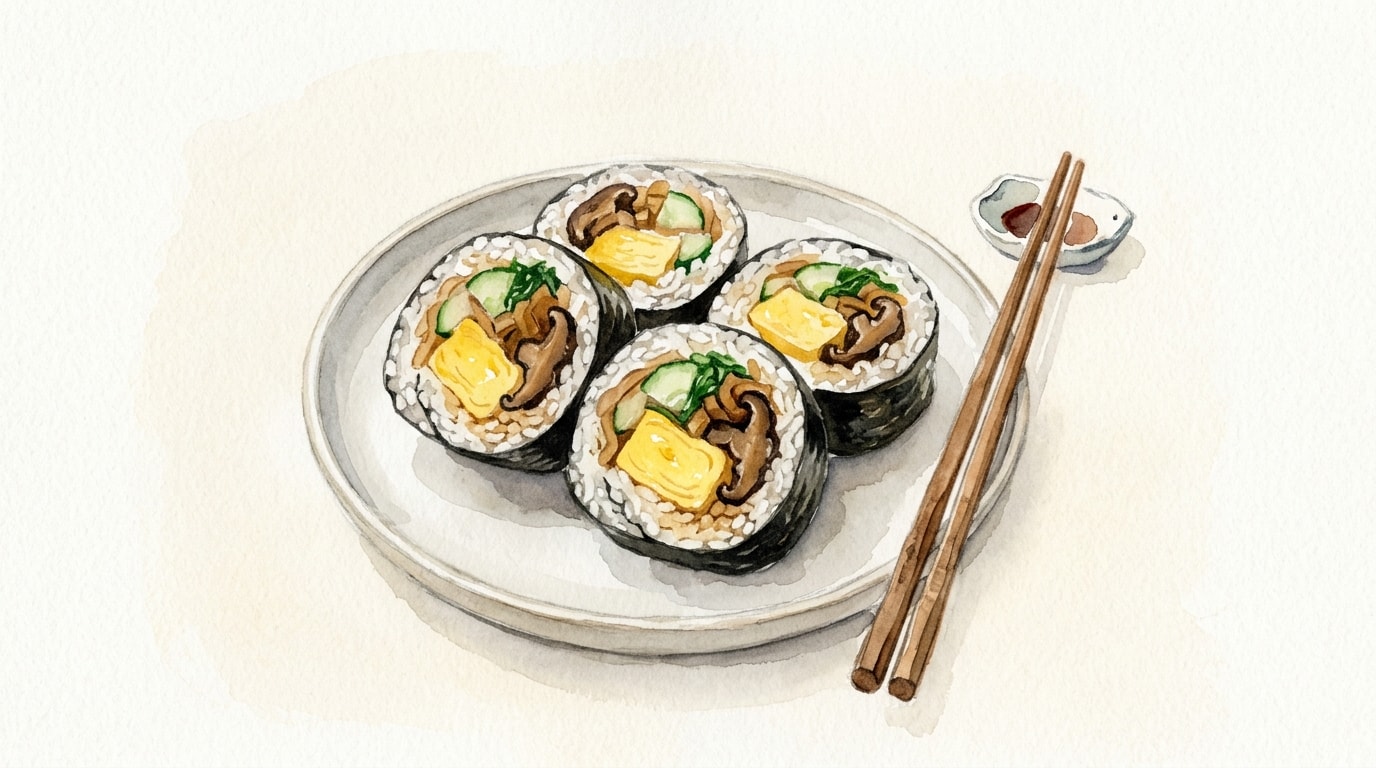
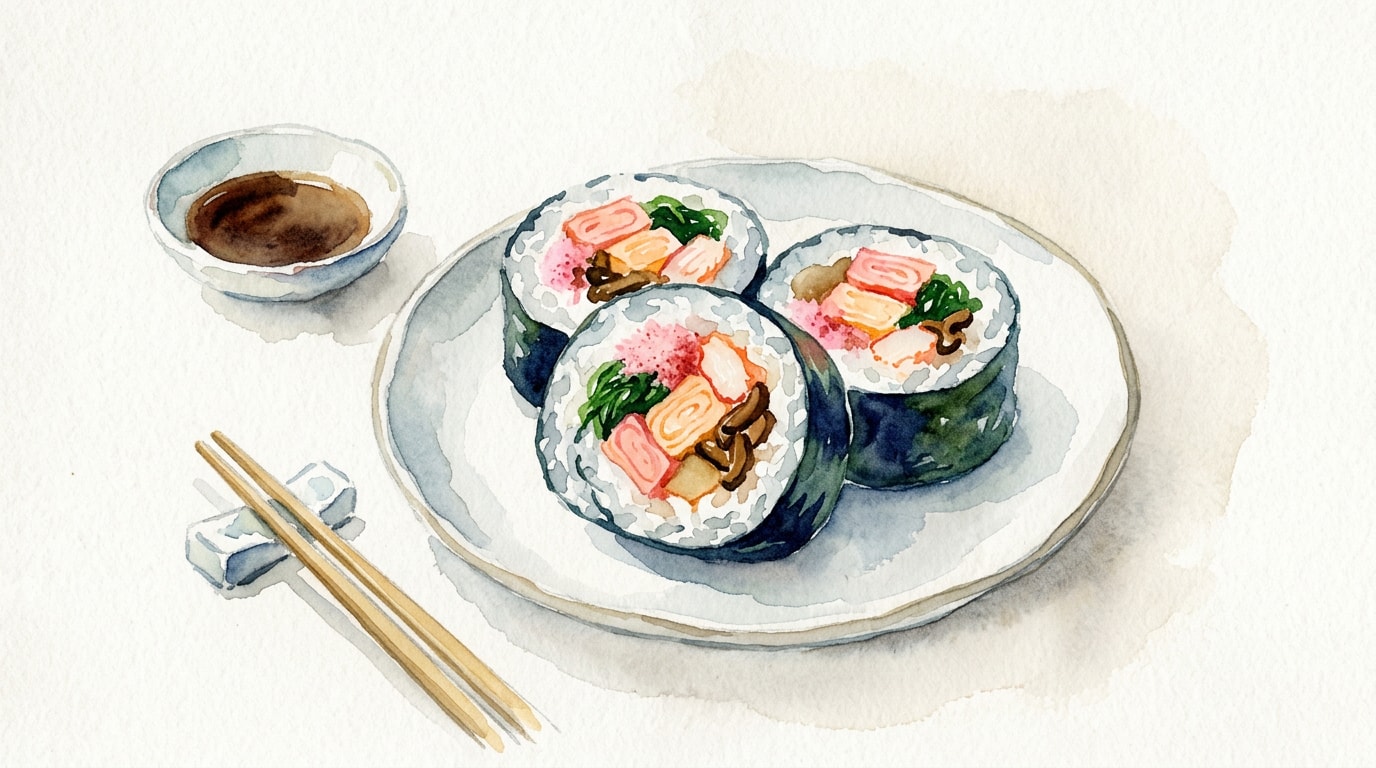
Arrange half of the tamago strips, simmered shiitake mushrooms, and carrots in a neat, tight horizontal line across the lower third of the rice-covered nori sheet.
Lift the bottom edge of the bamboo mat with your thumbs while holding the fillings in place with your fingers. Roll the mat up and over the fillings tightly. Continue rolling forward until the exposed nori at the top edge meets the roll and seals it. Gently squeeze the bamboo mat around the roll to form a compact, even cylinder. Repeat for the second roll.
Wipe the blade of a very sharp knife with a damp kitchen towel. Cut the sushi roll in half, then cut each half in half again to create equal quarters, yielding eight pieces per roll. Wipe the blade clean between every single slice to prevent sticking and tearing.
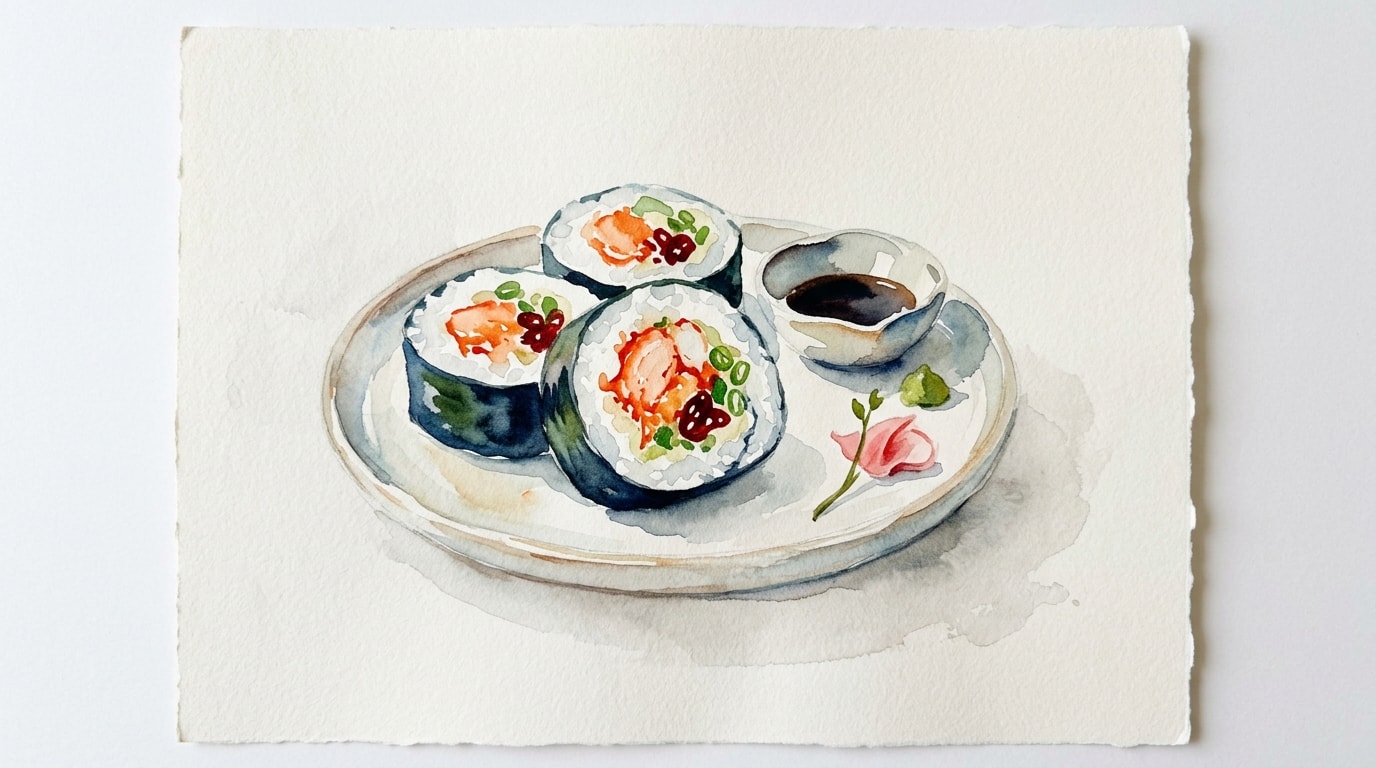
Arrange the cut slices flat on a serving platter to display the distinct, colorful cross-section of fillings. Serve immediately at room temperature.
Chef's Notes
- Always prepare a bowl of vinegared water (tezu) for your hands when assembling sushi. A ratio of 1 part vinegar to 4 parts water prevents the sticky rice from adhering to your fingers.
- Wiping the knife blade with a damp cloth between every single cut is not optional for clean presentation. The rice starches build up rapidly on the blade, causing the delicate nori to tear.
- Do not skip fanning the rice while folding in the vinegar. The rapid cooling evaporates excess surface moisture, locking the seasoned coating onto the exterior of the grain and providing a beautiful glossy sheen.
- When simmering the vegetables, wait until the liquid is almost entirely gone before stopping the heat. This ensures maximum flavor penetration and prevents excess moisture from making the final sushi roll soggy.
Storage
Refrigerator: 24 hours — Wrap tightly in plastic wrap. Note that refrigeration will significantly harden the sushi rice.